Sunday, October 21, 2012

Birthday Wishes (Recessed window with quilling embellishment)


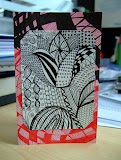
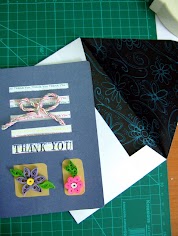
Made this card for a friend's birthday. I used the recessed window and easel techniques for the card.......guess that I've fallen in love with this techniques (*-*). Simply fascinated by the frame-like designed.

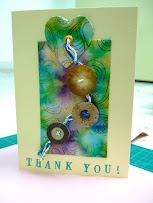
I used quilling paper as an embellishment for this card. Inspired by Inna's Creation and Lin Handmade Greetings Card; While browsing through for ideas I found the beehive quilling technique & it was amazing and tempting. This technique was invented by Susan Quilling. Do check out their amazing sites. Could not resist myself but to make one too. My first attempt was not bad though (*-*).

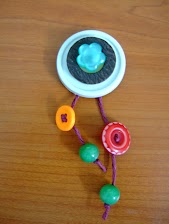
It was an interesting technique; No doubt at first I struggled inserting the curled paper inside the petal, but after a few practices and attempts I made it. In fact it can be addictive too. In order to make it easier to insert the curled paper, roll it then slot into the petal; Be careful not to pinch too hard else you might spoil the structure.


Once completed, I arranged six petals to form a flower. Glued them, waited for it to dry and finally added the round coiled paper in the centre. To make the coiled more interesting, I pushed out a little bit to create a hump. The flower's diameter measured 5.5 cm.....pretty big.

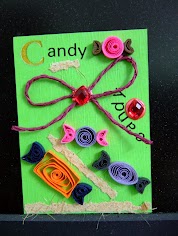
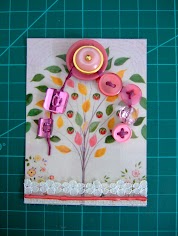
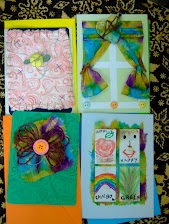
Arranging the flowers; Earlier I intend to arrange the flowers in the centre of the frame. But then I changed my mind to arrange along the edges. Chose three pink flowers with the beehive technique and the remaining embellished with pink flower buds. Added in 'Happy Birthday' wording and a little red bird in the middle.


I printed out her picture where I used double images. Firstly printed out the bigger image then follow by the  smaller image using the same photo paper. Finally wrote a personalised messages before handing it over to her ;-p.....

Wish all readers a happy weekend and a great week ahead.
Happy crafting (*-*)

Monday, October 8, 2012

.....Halloween is here.....


Halloween is around the corner; The celebration falls on the last day of October yearly. I don't celebrate but I love reading the history of Halloween. Anywhere I've plan to make Halloween cards for my relatives who are now residing overseas. By the way, I've created few designs related to Halloween & I would like to share with anyone who're interested. Furthermore you might have some ideas on how to decorate your card (feel free to share).
I'm not sure whether I'm a spider fanatic but while drawing these images I can feel the spiders dangling all over me......hehehhhheee (too much imaginations *-*)
I don't want to create something serious & that is the reason all my spiders are smiling except one which I purposely leave it blank. By then I can decorate or add something else later.
I still have few Halloween designs which I will post later. Till then, a great week ahead & have fun creating your card.

~ Imagination is creativity. ~

Sunday, October 7, 2012

Make your own children's song book

 Fun with handmade children's song book


Made this song book a couple of months ago; It was meant for our assignment whereby we have to use recycle materials to create one (but I have already received an order from friends to make similar but different contents). Many thanks to Noraini Redzuan who happened to be my partner making the children's song book. She has made plenty of efforts to find the Malay children's songs & decorated them too.


Used calendar stand
  
Insert string into the holes
For it's cover & pages I used the table calendar stands. That means I need plenty of the stands. I was lucky because I've been collecting it for sometimes & the sizes were similar (In fact, I've done the 1st one as a journal which dedicated to someone but never had a chance to pass it on (similar with this song book)).

I used nylon string to bind the calendar into a book (you can also use other materials such as ribbons, twine etc..but please ensure it is strong enough to hold the thick pages). The processed was easy only during inserting the string into the holes it's a little bit hassled and time consuming. Once done, you can start decorating the pages.


We have compiled 14 children's songs (8 songs in Bahasa Malaysia & 6 English songs). Song selections can be seen in the pictures. Each page is decorated with colourful pictures. Indirectly this is another way to encourage children to read and love books. It is essential to develop reading interest in an early age & as early as possible. To gain a bountiful & prosperous harvests it must starts from a good & healthy seeds.
The images & pictures were downloaded from the internet. If you have plenty of time you may design your own artwork.
In this case, we were given less than 2 weeks to complete & other assignments(another excuses (*-*)).... Well it's a reasonable excuse anywhere (^p^); We juggle our time with work, study and some of them with family & children.
Below are our final work (unfortunately we're unable to get it back as the college is keeping it for reference)


---------------------------------------------------------
 
There were few songs & rhymes where I decorated in an interactive way. The 'Ten Little Leaves' song. I added pockets where the images of the leaves were hidden except for number 10 (You can also cover the last number & ask your child to predict the answer then take off the cover; It would be an exciting experience for your child). Each leaf is numbered with different colours. As you pull the card you can see the numbers. It is another method to introduce numbers to a child.
-----------------------------------------------------------------------


The 'Five Little Squirrels' rhyme; I added the squirrels pictures. As you read paragraph by paragraph you can pull out each squirrel until it's gone. I suggest every time you finish reading each paragraph ask your child to count how many squirrel left? Then continue. This is another way to introduce your child the basic arithmetic.

I used double sided Velcro tape as it can be easily pulled and pasted. The squirrel images were laminated in order to secure them & can be used for a longer period.

---------------------------------------------------------------


'One, Two buckle my shoe' is one of my childhood favourite rhyme. I made it slightly different. Instead of writing words and sentences I created a related images. A child will see a number and an image for example buckling a shoe. I made a pocket on top where I can slip the word card. As you can see in the first picture, it only shows the title of the rhyme. As you read through, you can pull the card slowly based on the picture. Finally the whole card appears (Or maybe you can create 'Find an object' game; example: Can you find a door/stick/hen/shoe etc..?)

If you do not want the word card goes missing you can make an alternative by making a hole and tie a string between the word card & the picture card.
----------------------------------------------------


For the 'Five Little Cookies' I added number of cookies right after the symbol. As the number decreased the cookies decrease too until there is no more cookie. At the bottom of the page, I printed out cookies with different shapes & colours. Cut then added a magnet behind before sticking the images onto the main page. The second step, I printed another smaller images of cookies then laminate each picture. You can use the smaller pieces for matching activity for your child. It can be used to learn shapes and colours too.

Before laminating, I pasted the magnet on each of the picture then cover it with paper because I do not want to reveal the magnet. In case you do not have laminating tools, you may use the wide cellophane tape to cover it. The purpose to cover or laminating the cards is to protect it, easy to clean and can be used many times. In this project it is better to use the magnet sheet.

Happy weekend & I do hope you enjoy this.
-----------------------------------------------------------------------

~Imaginations is creativity.~There're no limitations in life until you stop doing so.~Some people may belittle you with what you're doing; Don't worry one day they will acknowledge & by then you've forgotten about them.~

Just for sharing

I've created and designed many cards sometimes ago but never have had a chance to share them into my blog. The usual silly excuses 'NO TIME'; In fact I don't like saying this particular phrase because we were given 24 hours a day to do our chores inclusive resting and eating. Today I decided to share some of the things I've done previously & I do hope you'll enjoy each of my creations. Forgive me for the low pixels quality, I lost the master file; I could only have this.

----------------------------------
                 
Zentangle pattern incorporated into Inchies,
then to the ATC card
Different designs of Inchies


Brief explanation about everything I've done. Inchies means cut into sizes of 1" square. You can decorate your Inchies using various media such as colour pencil, arcrylic paint etc.. In other words Inchies is a 1"x1" piece of artwork. I really have a great time creating Inchies; You can also add this onto your card as decoration.

-------------------------------
  
Zentangle is where you draw a structured and repetitive patterns which finally will emerge to a beautiful abstract design. You can simply draw something & the finishing is always wonderful. It is easy to learn, fun, stress free and all you need is a fine tip pen. I used the Artline Drawing System pen; I do have plenty of tip sizes ranging from 0.1, 0.2, 0.3 up to 1.0 if not mistaken (too many to count).

---------------------------------
 

 Artists Trading Cards or ATC is a miniature card measured 2 1/2" by 3 1/2" originated from Switzerland. ATCs are usually traded or exchanged. The cards can be produced in various media including dry, wet, paper or even metals or cloth.

  
---------------------------------
Bookmark
Bookmark from wire
 
Button magnet


Affirmation bookmark (based from recycled banana leaves)  


Linkwithin

Related Posts Plugin for WordPress, Blogger...